A Complete Guide to Veneer Preparation
How can you prepare the perfect veneer for your patient’s teeth? Just like other dental treatments, veneer preparation requires precision and a high level of expertise. For the treatment to be successful and deliver the esthetic outcome the patient desires without complications, you need to carefully consider the most suitable material based on the patient’s clinical indications and personal needs, as well as the tooth preparation steps and veneer design before treatment.
Whether you are placing a single veneer or multiple veneers to create a symmetrical smile, the preparation directly impacts the success or failure of the esthetic procedure. In this article, we will look into several factors to explain why veneer preparation is essential to achieving the highest level of patient satisfaction.
Guide to Proper Veneer Preparation
Veneer preparation creates the foundation for both the esthetics and function of a patient’s smile. Whether porcelain veneers are used to correct discoloration, minor misalignment, or structural flaws, the preparation process should always be customized to each individual case.
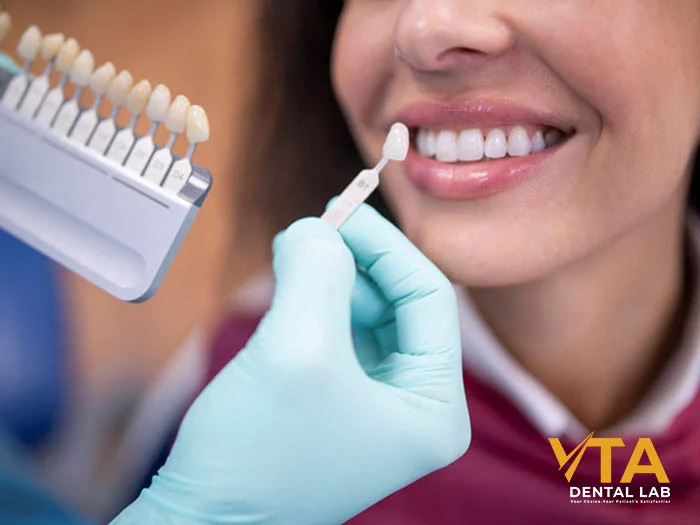
Choosing the Right Shade
Natural tooth structure displays a variety of colors, such as brown, yellow, translucent white, and opaque white, all gradually shifting from top to bottom. When selecting the appropriate shade, you must take into account the patient’s natural tooth color to achieve seamless harmony, because over time, the underlying tooth color may become more visible through the veneer, causing it to appear increasingly yellowish.
Several factors influence shade selection, including:
- Characteristics of the patient’s natural teeth
- Skin tone: The same veneer shade can appear different depending on whether the patient has light or dark skin, as well as the color of their lips.
- Other cosmetic procedures, such as lip fillers or dermal injections, may affect how veneers appear in the oral cavity.
- Lifestyle: Patients who frequently consume alcohol, tea, coffee, or smoke may require a combination of multiple tooth shades for a more natural look.
Since esthetics can be perceived differently, the desired shade should be the first mutual decision between you and the patient. Importantly, a natural-looking shade is recommended to ensure the restoration blends in seamlessly and appears more lifelike.
Veneer Preparation Dimensions
After selecting the appropriate shade for the veneer, the next step is tooth reduction. Proper tooth preparation ensures that the veneer harmonizes with adjacent teeth; insufficient or excessive reduction may result in bulky restorations that fail to blend naturally.
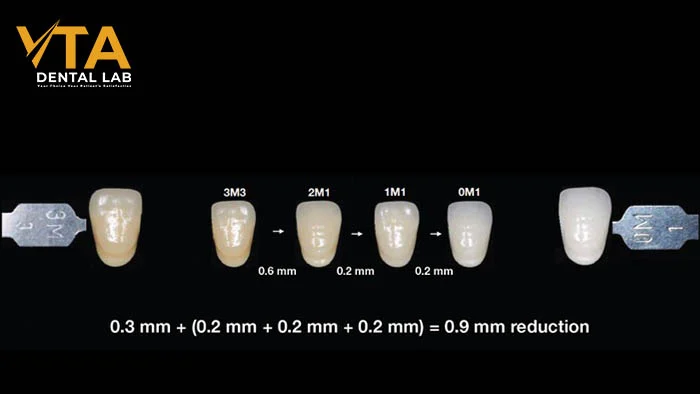
Each material used to fabricate veneers requires specific design considerations and thickness to ensure strength and durability. For instance, E.max veneers are lighter in structure compared to other veneer types, so only minimal tooth reduction is needed, preserving more of the patient’s natural tooth. However, a thinner veneer layer may allow the underlying tooth color to show through. If the patient’s teeth are discolored or yellowed, whitening should be performed prior to veneer placement.
Planning Veneer Preparation
When planning veneer placement, note that worn teeth or older teeth often require less preparation compared to younger teeth, while misaligned teeth need to be adjusted through preparation based on their shape and position. In addition, changes in the current width and height of the teeth also affect the veneer fabrication process.
The parameters for minimal, moderate, or extensive veneer preparation vary depending on the degree of correction required.
- Minimal preparation veneers usually involve reducing the tooth surface by 0.5–0.7 mm.
- Moderate preparation veneers require tooth surface reduction of about 0.8–1.0 mm.
- Extensive preparation veneers may need a 1.0–1.5 mm reduction to address both esthetic and functional concerns.
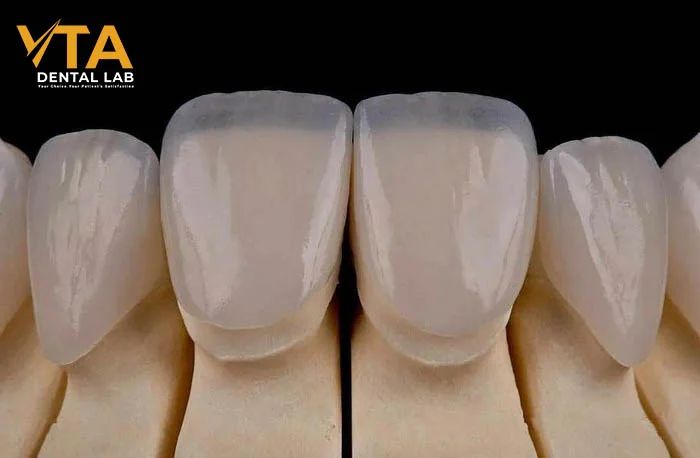
Comparison of natural teeth before and after veneer preparation
Veneer Preparation Groups
Based on the preparation dimensions you determine when selecting the shade and deciding the amount of tooth reduction, you can choose the appropriate type of veneer preparation. Currently, there are three main types of veneer preparation, depending on the material used for veneer fabrication and the corresponding tooth reduction required.
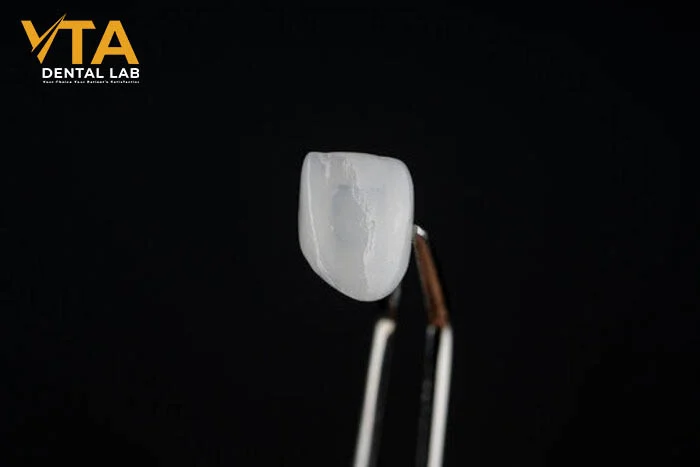
Minimal Preparation Veneers
Minimal veneer preparation is one of the most conservative approaches in veneer fabrication, preserving as much natural tooth structure as possible. This method is suitable for addressing issues such as tooth discoloration, chips or fractures, and patients with enamel defects.
This technique allows for minimal changes in tooth shade and shape while ensuring a natural-looking result. Minimal preparation is an ideal option for well-aligned teeth with only slight color variations and without significant spacing between teeth. The recommended materials for minimal-prep veneers are typically pressed monolithic ceramics such as IPS e.max or layered feldspathic porcelain veneers.
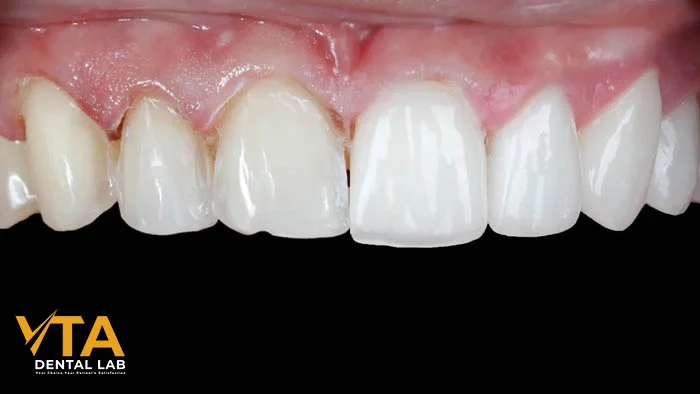
Minimal veneer preparation showing conservative enamel reduction
In most cases, this treatment requires two dental visits. During the first appointment, a small amount of enamel is removed, and impressions are taken to send to the dental laboratory for ed veneer fabrication. A temporary restoration is placed to maintain esthetics and function while the permanent veneer is being fabricated at the lab.
Moderate preparation veneers (Medium Preparation)
The traditional preparation of the veneer method strikes a balance between esthetics and preservation of tooth structure. This approach is typically used to address moderate changes in tooth shape and color. Pressed ceramic materials such as E.max are also recommended for this type of preparation.
Technician placing a retraction cord on the model for veneer preparation planning
Extensive Veneer Preparation
Extensive veneer preparation is usually indicated for patients requiring significant color changes or correction of functional and structural issues, such as trauma or malocclusion. This method involves the removal of a larger portion of enamel and dentin. Therefore, the bonding technique is crucial to ensure both the success and longevity of the restoration.
Technician placing a retraction cord on the model for veneer preparation planning
This type of veneer preparation is suitable for cases that demand more rigorous adjustments, such as closing gaps larger than 1 mm or when the patient’s dentition shows multiple diastemas. It is especially recommended when substantial color modification is needed—for example, adjusting the brightness or saturation by up to three shade levels compared with the patient’s original tooth color.
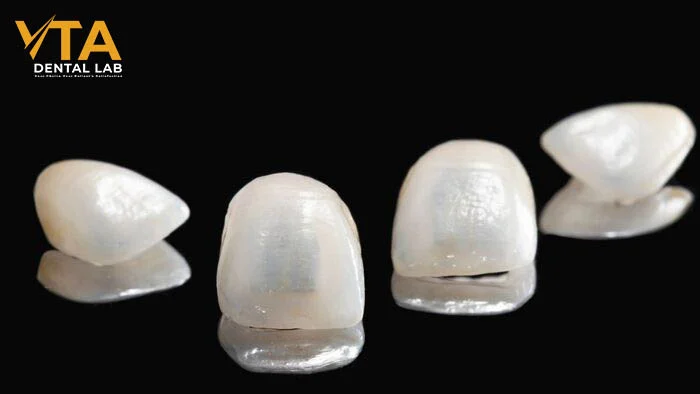
Veneer Preparation by Material
- Composite Resin: Made of methacrylate resin and inorganic fillers (such as glass). This is the most affordable veneer type, easy to repair, but less durable and more prone to staining compared with porcelain.
- Porcelain: Primarily glass-based with no distinct crystalline structure. Stronger and more durable than composite, with excellent esthetics and high stain resistance.
- Lithium Disilicate: A ceramic composed of lithium and silicon. It offers high translucency and closely mimics the natural color of teeth.
- Zirconia: Another type of ceramic, but more opaque than lithium disilicate. Extremely durable, highly stain-resistant, and biocompatible (gum-friendly).
Steps for Veneer Preparation
Veneer preparation depends on several factors, including the available space, veneer thickness, the patient’s enamel volume, the outer enamel edge, and dentin exposure. Below is a simple overview of the steps involved in preparing teeth for veneers.
Initial Examination
The initial examination gathers comprehensive information and clarifies the desired outcome for the veneer case. Assess the patient’s oral health to ensure they are suitable for treatment, and evaluate tooth position along with esthetic concerns that need to be addressed.
Tooth Preparation
Remove as little enamel as possible to preserve adhesion for the restoration. In some cases, however, more enamel removal—and sometimes dentin exposure—is required to accommodate the design of the veneer.
Key considerations during this step include:
- For conventional porcelain preparation, reduce more enamel in the interproximal areas than on the outer surface.
- If there is a horizontal finish line, taper the enamel reduction from the incisal edge downwards so the technician can conceal the transition between the veneer and natural tooth.
- For multiple veneers in a full-arch case, design the preparation with a feather-edge margin, giving the technician sufficient space to achieve optimal esthetics and occlusion.
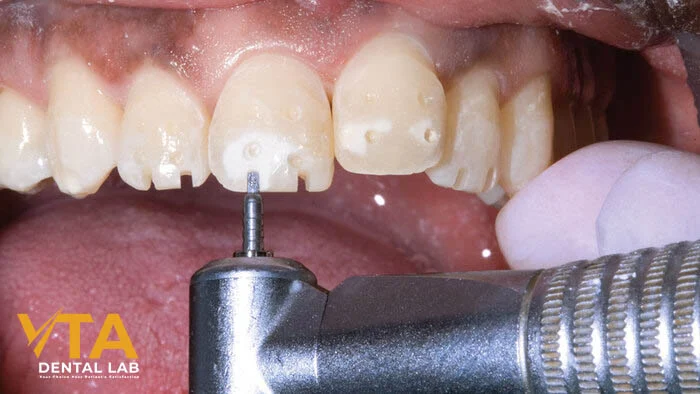
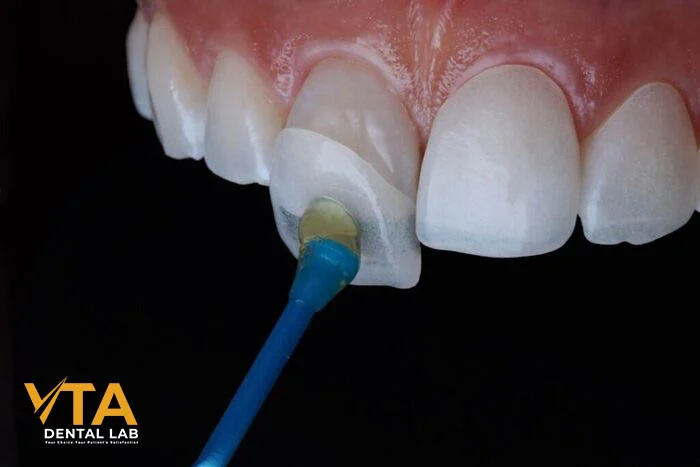
Step-by-step guide showing veneer preparation on anterior teeth
Impression Taking
Next, take an impression of the prepared teeth using either an Oralscan digital scanner or traditional methods. For veneers with margins below the gumline, place a retraction cord (the double-cord technique is recommended) and remove it before taking the impression. Send the digital file or impression to the lab for design, wax-up, and fabrication.
Temporary Veneer Placement
If a significant tooth reduction was performed, place a temporary veneer to prevent sensitivity. Select the appropriate size and shape, bond with temporary cement, and provide the patient with instructions for proper care.
Final Veneer Placement
Before cementing the final veneer, try it on without cement to check fit and adjust shape if necessary. Once satisfied with size, shape, and cement choice, clean the prepared tooth surface.
Finally, apply the bonding system, remove excess cement, and perform final trimming and polishing. Assess the patient’s occlusion after placement to ensure proper fit and function.
Why Veneer Preparation Is Important
Proper veneer preparation contributes directly to the success of the treatment in several ways:
- It ensures that tooth thickness does not increase after veneer placement.
- It helps achieve a tight and secure fit between the veneer and the tooth.
- It allows for the removal of caries or replacement of composite restorations when necessary.
- It enables the clinician to use a thicker restoration when needed, which is important for masking discoloration or altering the tooth’s shape.
How VTA Simplifies the Veneer Preparation Process
One of the most important factors in ensuring successful veneer fabrication for your patients is partnering with a reliable dental laboratory.
With over 20 years of experience, the team at VTA Dental Lab knows how to deliver beautiful, high-quality restorations along with professional customer service. By working with us, you receive direct support from master technicians who assist you in every case.
Deliver exceptional restorations to your patients by partnering with VTA Dental Lab. Contact us today or click here to explore our full range of products.